
experimenting with volumes and composition.
rigging a character, rigging a shader and animating composition nodes — all made with Blender.

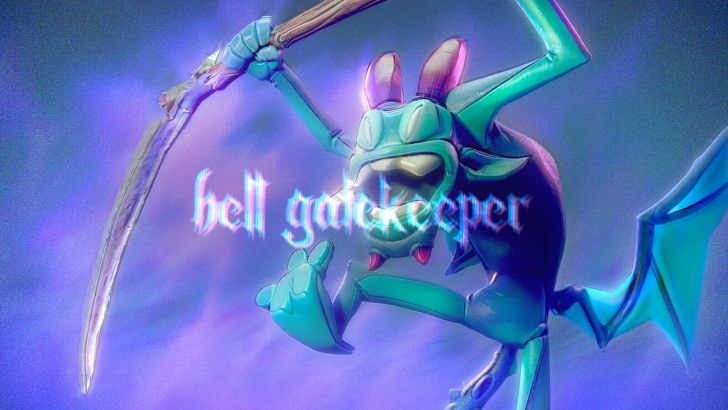
In the previous post, I shared my latest concluded personal project: Devilish — a model based on the character Hell gatekeeper from one of my favorite character designers, Satoshi Matsuura (hiziripro). Today we’re going to explore more about the process of creating this piece.

As I’ve mentioned in the other post, I’ve taken the decision to push my projects a bit further — especially in the way of improving my art directing and visual development skills. With this project, this process happened very organically. It started as a modeling and sculpting practice, but I saw the opportunity with this design to explore other parts of the 3D world, parts that I’ve been interested in for a long time, but never gave a serious chance to experiment; that is animating and making visual effects.

The somewhat simple design made it easier to rig the character, while the fantasy subject opened spaces to think of funny ways to bend the character with effects. With these results, I felt encouraged to make a scene to practice some art direction.
In this post, I’ll talk about my artistic decisions for this project, and as a breakdown, I’ll approach the process in the order things happened. In the breakdown, we’ll start with the modeling process, talking about my references, then going through the rig and animation process, moving on to the post-processing and composition. I’m not going to talk about the texturing in this post — it was a pretty common and straightforward texturing process, not much to share really — but feel free to ask if you’re curious about any aspects of the textures!
— art direction.
Quick thoughts on this subject;
Recently I’ve taken the decision to make more consistent and solid choices when working on my project’s visuals, not only to build an authorial style, but to understand ways of experimenting with visuals in the 3D media universe.
A 3D artist is usually very tempted to replicate visuals — I can’t really tell from other media artists, but I suspect that this is a common thing among artists in general; but when it comes to 3D artists, we’re so deeply involved in the technical side that exploring visuals and concepts is somewhat a bit of a tiring process. We just want to get the job done — whether it is a modeling, texturing or whatever.
Our relationship with our artwork is usually approached as a practice. We start an art piece as a practice exercise — because we want to improve on a skill, or simply because we have a lot of fun doing it. Most of the times we’re restricted (by ourselves) to the technical side.
With that I’m trying to find another way to relate to 3D art, on a more intellectual sphere, where I can cogitate about the intentions on the visuals. I know this sounds pretentious, but it’s nothing too deep, really. I’m just talking about expanding my references and deepening my intentions with the visuals (not only replicating models and concepts from Pinterest and ArtStation — again, nothing wrong with this).
At the end of the day, it is still a practice exercise, but this time not only technical. At least I feel like it’s more of an intellectual, artistic practice. It is fun too!
With all that said, I understand that I’m still a beginner on this journey — not for nothing people seem to have enjoyed the character demo more than the final piece on this project. But it is a journey and I’m sure we’re going to reach somewhere more interesting in the future.
Now, let’s talk about the actual art direction for the Hell Gatekeeper project:
It may sound redundant, but I was looking for an old-school look on this one. My interests are always shifting between themes and visuals, while I also love NPR, stylized renders with brush strokes, procedural shaders, 2D effects on the screen and so on; I also love grounded, physically based renders, with realistic and stylized lights, but all based on photography. This time I was looking for this second approach — I’ve been experimenting a lot with photography elements in side projects, with things like noise, chromatic aberration, exaggerated field of views and so on.
I thought it would be fun to approach this old-school look on a thriller-themed character. Using references from the late 90’s and early 2000’s shows, I depicted these visuals with the VHS sound fx and glitch on the visuals. You can argue that I used too much effects and it ended up screwing up the character visuals a bit, but this was all intentional. I did use a lot of color channel tweak, sharpen effects, lens distortion and VHS footage. I love how everything came out, but I understand if you’re more interested in a cleaner look.
The art directing for this final piece came as a final step, which is not ideal, so some of the elements might feel arbitrary — I mean, it is only a character presentation with a fancier set, introduction and conclusion cuts. There’s no narrative or story in the reel, so I just went with concepts that could match the vibe I was feeling with the character. At the end it was an experimental piece and I learned a lot with it.
— project breakdown.
modeling.
Usually, when modeling, I’m always looking for ways to keep the mesh clean and easy to work with. My background is in polygonal modeling, so when I moved to sculpting I already had a solid knowledge of the 3D modeling fundamentals, especially in topology. For that reason, even in ZBrush, I usually work much better with surfaces that aren’t too dense, making a lot of adjustments using ZModeller, working most of the time with the Move and Smooth brushes, always using lower Intensity values.
Of course, I do have a lot of experience with sculpting too, but most of the time I don’t really need to get to sculpt things, particularly in professional projects, so I decided to push myself further.
Since this character’s design is very simple, I’d have to get creative to add details through sculpting — and that was the main challenge in this part.
My main reference for the details sculpting was Borislav Kechashki’s work. I love the way he manages to make the model surface feel rich and detailed while keeping everything clean and simple. Sure, there are a lot of works on the lights and texturing, but we can see that a lot of the surface properties are achieved in the sculpting step — at least that’s what I feel when I see Borislav’s work, and it was this very aspect that I wanted to understand.
In the middle of the sculpting process, I understood that I couldn’t add too many details to the model because I decided to animate the character. A lot of these details would get hard to be kept on the animated poses, everything might become too distorted, so I was only able to make more details in the static models: in this case I decided to spend more time on the character’s prop, the scythe.

I recorded part of the sculpting process and you can find the timelapse on the blog’s YouTube channel.
rig and animation.
The rigging process was pretty straightforward — I’m not a rigger or an animator, but I do understand rig logic and I had some experience with previous projects, especially projects I made back in the days, during my graduation course.

I built the rig from scratch, using regular IK and some simple controls, nothing advanced, really. Only used codes for the blink and mouth opening because it was easier to make it move with shape keys (blend shapes for non-Blender users). The more challenging part was making the FX rig or shader rig, if you prefer. I used several drivers and shared parameters to optimize the animation process for the visual effects. I also used Geometry Nodes and Simple Deform modifier to achieve mesh deformation.
Here is a more complete video showing the rig interacting with the character while rendering. It’s obviously sped up, but the scene is pretty responsive. The render just started to get slower when the volumes were completely exposed — especially when the character is twisted.
volume shaders.
I’m back using Cycles for rendering again (although I’ve been missing real-time rendering lately) and I’ve always loved the visuals that volume shaders deliver. I already knew that working with volume was challenging in many ways, especially with the render time, but I was keen to test some things.
To push the challenge further, I created the environment using volume materials as well. It is all procedural, a mix of Voronoi and gradient textures, using several color ramps and animated parameters.
It turned out to be very simple to make the scene, the trickiest part was to find a lighting setup that could make both the character and the set look good, all of this while both them volumes were emitting light.
Here is a quick demonstration of the scene environment animation. It is a spherical gradient following the empty sphere's parameters, with that I just needed to animate its transform values to get the expanding effect after the character’s impact frame.
conclusion.
I learned a lot about volume shaders — and understood that it shouldn’t be used unrestricted. This project made it clear to me that there’s a reason why fx artists use countless other ways to achieve translucent and magic effects while working with 3D art.
Animating this character was absolutely fun. I had a great time animating it and I finally understood why I hated to animate back then: I just needed a decent rig! It doesn’t need to be complex and advanced it just needs to be decent.
Working on the rig was a bit of a pain, though — it just drove me straight out of the artistic vibe. Hence the reason I always hesitate to make animations on my projects. I gotta find ways to rig faster or just find people who could help me — reach out if you’re interested!
I loved making decisions about directing and art directing. I’m more and more sure that working in directing is my main goal from now on, and I’ll focus my efforts on that skill — that embraces a whole bunch of other skills, and, of course, teamwork.
Okay that was a lot of words! Thank you so much everyone, especially for those that faced this whole large post.
Very nice, my friend. It was really cool to understand better your process of conception and execution of this work!